Tuesday, December 1, 2009

Brook Rd, Day Seven

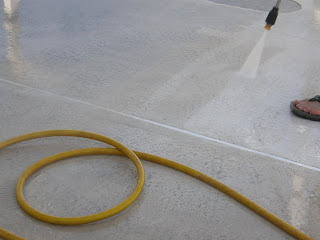
Yesterday was the final day on site. The gutters were finished, the pool deck was pressure washed and the steps into the doorways were protected using Tuff Top to prevent wear from foot traffic.


Pressure Washing pool deck


Pressure Washing pool deck


Tuff Top on kitchen door step


Pool Deck after completion


Different Angle of pool deck


Side of house


Other side of house


Front of house


Front of house

Sunday, November 29, 2009

Brook Rd, Day Six

Today was hopefully going to be the last day on site, but due to unforeseen circumstances, we started late and had to finish early.

We did however manage to paint all the fall pipes and remount them back onto the house.


Gutters back on house


While the fall pipes were on the ground being painted, we painted the gutters with two coats of paint.


 Drop cloth over pool equipment


Drop cloth covering pool equipment during painting

As all the walls were now painted, we took the opportunity to Quality Control our work. We walked around the perimeter of the house and marked any spots that the paint had missed with blue tape to help them stand out easily to then be painted over.


Blue tape marking needed touch ups


The last thing we did today before having to leave was to remount the ceiling fans in the lanai area.


Ceiling fans remounted


Tomorrow will be our last day on site. We will be washing the pool deck with the pressure washer to remove debris and then cleaning up around the house and removing all our tools.

Saturday, November 28, 2009

Brook Rd, Day Five

Today was the day we had set aside to do a lot of the fiddly things such as the doors and and finishing trim work. We started with the garage door. First the door was pressure washed, then swept down once dry and then we started to apply the paint.


First touch of paint


Door nearing completion

While the garage door was being completed, we removed all the other doors to the house and set them up in the garage to be painted. For the wood doors, this meant taping up all the windows before we were able to begin.


Smaller door nearly fully taped


Halfway through staining the larger door

We also set about pressure washing the pool cage today.


Pressure washing tearing through the dirt


Cleaning the slide

We even found time before sun down to complete the ceiling.


Brook Rd, Day Four

Yesterday was a day of forward movement. By that, I mean we got the ceiling up.The day started out by loading up the big toys into the back of the truck; Compressor, Nail Guns, Table Saw and Chop Saw.


Table Saw, Chop Saw, Nail Guns and Compressor loaded on the truck

 Before tackling the ceiling however, we went on the side of the house to fill an old hole that had been uncovered during pressure washing. We filled the hole with some stucco patch, let it dry and repeated the previous process to build up layers within the hole. We then finished it off by texturing it to match the rest of the house.


Hole in the wall


First layer of stucco


Hole fully filled and textured

While the layers of filler were drying, we pressed on with putting up the new ceiling boards.


First board nailed into place


Second board


First row complete


Ceiling complete up to the first fan power box


Second power box


All ceiling boards in place

After the ceiling was completed we had just enough day light left to cut all the pieces of trim that go around the perimeter of the ceiling. 
 

Thursday, November 26, 2009

Brook Rd, Day Three

Happy Thanksgiving!!!

Unfortunately, after yesterday's downpour we've had to work this morning on Thanksgiving. Thankfully, we did get a lot done today.

The entire front of the house has been painted, except for the garage door, and the lights and everything else removed has been replaced.


Front of the house after cutting in


Front of the house after painting

After the front was completed we moved around back and started on the lanai area, the aim being to have the lanai painted so we can install the ceiling tomorrow and have the lanai completed.
 

Lanai, mid-paint

Whenever we came to a crack, there is a 3-step process to repairing/filling it. First we scrape out the paint and any old filler, next we add ConSeal to cover the crack, and finally we work the ConSeal into the crack and use it to add texture above the crack and blend it in.


Cleaning the crack prior to filling


Applying ConSeal to the cracked area


The crack after texturing and just prior to painting.

Brook Rd, Day Two

Not much was done today on account of the rain washing us out. 


Rain outside the garage 

We were, however, able to get the ceiling panels covered with primer, making them ready for paint.


Painting the valleys with a paint brush


Rolling the primer over the majority of the board


A fully primed board


4 of the 10 ceiling boards fully primed

Tuesday, November 24, 2009

Brook Rd, Day One

Today was the first day of work at Brook Rd. We have been hired to replace their lanai ceiling and repaint the exterior of the house including all the doors. 

The day started by pressure washing the exterior of the house including the lanai, porch and all the recessed windows and doors. To ensure that the new paint will bond with the walls, some areas were washed to reveal bare wall from where the last paint had not adhered well.


This is an example of the paint being washed to bare concrete

After pressure washing, we trenched out the entire exterior of the house. This will allow us to paint below ground level so that when we push the dirt back against the house there will be no painted grass and no breaks in the paint where painters usually stop, revealing a 1" space on the wall where they did not paint.

The final job of the day, prior to cleaning up, was to remove the ceiling from the lanai.


The ceiling just prior to drywall removal

We started by laying out drop cloths to capture the majority of the debris and then removed the ceiling fans and put them safely out of the way. Once this was done, we were able to start tearing down the drywall to reveal the ceiling rafters beneath.


A piece of Drywall on the way down

Once all the Drywall was down and loaded in the back of the truck ready to be taken away for disposal, we were left with hundreds of nails and screws that the previous contractor had used to attach the drywall to the rafters with. Cue an hour of de-nailing. 
 

Clean ceiling rafters ready for new ceiling boards

Tomorrow we will start priming the new ceiling boards, as well as taping off windows, removing old caulk, removing the fall pipes for painting and filling all cracks.